Le workflow IA ULTIME pour créer un site pro : Claude Design → GPT Image 2 → Claude Code
AI Summary
This video demonstrates how to create a website from A to Z using AI, covering design, editing, code generation, animation, security, SEO, and deployment.
First, the process begins with finding design inspiration. A good starting point is Behance, where one can search for web design inspiration, particularly for a burger website in this case. Beyond web designs, it's crucial to draw inspiration from branding elements, examining how brands are contextualized in restaurant settings. The goal is to find branding that aligns with the intended concept. Pinterest is another resource, though it's noted that many burger website designs there are older, requiring more intensive searching for contemporary styles.
Next, the focus shifts to generating custom burger images. To guide this, existing burger images are used as inspiration. These images are then fed to Claude, an AI, with specific requests for different burger types (e.g., truffle burgers). Claude is then instructed to generate prompts for ChatGPT Image 2, which will be used to create the actual burger images. It's emphasized to select and save 2-3 preferred burger images to provide Claude with maximum context.
Before directly using Cloud Design, it's essential to converse with cloud.ai to establish a clear context for the desired design. This intelligent approach minimizes token consumption and avoids generating irrelevant content. Renaming images descriptively (e.g., "burger image," "brand image," "web design image 1") is crucial for Claude Design to accurately interpret them.
The core of the work lies in crafting the prompt. The prompt should be comprehensive, providing maximum information about what is desired. This includes generating prompts for both Cloud Design and ChatGPT for image creation. A key instruction for Claude is to ask clarifying questions if there's any doubt or need for additional information, as users often assume their prompts are clearer than they are. It's also vital to analyze each of Claude's responses, as they influence subsequent steps. The quality of the initial prompt for both image generation and Cloud Design is paramount.
After refining the web design prompt, Claude generates the final prompt for Cloud Design and, importantly, lengthy prompts for ChatGPT to generate the images. The length of these prompts reassures that Claude has understood the requirements.
Moving to ChatGPT, a new conversation is started, and the generated prompts are input. The results are reviewed, and if satisfactory, the process continues. If not, a screenshot of the unsatisfactory result is taken, and Claude is informed of the specific issues, which then adapts the prompt for another attempt with ChatGPT. Once the burger images are generated and satisfactory, each is saved.
A critical step before using Cloud Design or Claude for the next stage is to rename the generated burger images precisely (e.g., "classic burger," "farmer burger," "vegetable burger") to prevent the AI from mixing them up.
The Cloud Design prompt then needs adaptation. The initial burger images used for generating ChatGPT prompts are removed, replaced with the newly generated six burger images. It's also noted that Claude initially omitted ingredients and prices for each burger in the Cloud Design prompt, highlighting the importance of reviewing Claude's output for completeness before proceeding to Cloud Design, as it consumes tokens rapidly. Thorough preparation with Claude saves time and tokens later.
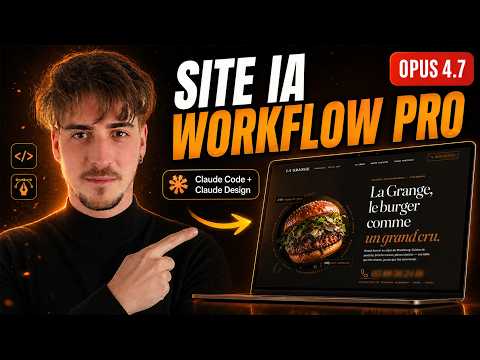
Once the prompt is refined and validated, the process moves to Cloud Design. A new high-fidelity project is created. All relevant images—the brand image, three inspirational web design images, and the six (or seven, including a hero image) burger images—are uploaded. The hero image is the primary visual and text seen by users upon landing on the site.
Cloud Design then generates an initial result. While not perfect, this is expected as it's the first phase. The "edit" tab allows for direct value changes without consuming tokens, enabling users to refine elements like the footer. Users can also draw directly on the design to instruct changes. Before making significant changes, it's crucial to save the current version to allow for rollbacks if the AI produces undesirable results.
The design is further refined, for instance, by changing a gold theme to black and copper. A new prompt is entered, and the updated design is reviewed. Specific elements, such as the square burger images, are identified for improvement, and instructions are given to change them. This iterative process of editing and updating continues until the design is satisfactory.
Next, the design is translated into code. A new Next.js application is created on the local machine. To integrate the Cloud Design output, the "share" option in Cloud Design is used to export to Cloud Code. If the design is too large for direct export, the elements are downloaded as a .zip file, unzipped, and manually integrated into the Next.js application. This includes site images and HTML files of different versions, requiring specification of the desired version and asset locations.
Once Cloud Code finishes, the local server is launched to view the application, which should align with the Cloud Design output.
Version control is then implemented using GitHub. A new repository is created, and the provided GitHub commands are executed to save the application. This ensures that in case of errors, it's easy to revert to previous versions and is essential for deployment.
An interior restaurant photo is added via Claude Code, followed by a "commit and push" command to update the GitHub repository automatically.
GSAP, a JavaScript animation library, is then used to enhance the application's animations. After the animations are implemented, another "commit and push" is performed.
Responsiveness is addressed next. The website's display on mobile and tablet devices is checked, revealing issues like a non-functional menu and improperly displayed burgers. To fix this, the Chrome Dev Tools MCP (Managed Component Package) is integrated into the project. Claude is instructed to use this MCP to analyze screenshots across different resolutions (mobile, tablet, desktop) and correct responsive problems. This proves highly effective, with Chrome Dev Tools automatically opening, controlled by Claude, to diagnose and fix the issues, resulting in a fully functional and correctly displayed site across all devices.
After resolving responsive issues, another "commit and push" is executed for deployment. The application is deployed by connecting to Vercel and adding the project, which is linked to GitHub. Deployment typically takes about 30 seconds, making the application publicly accessible.
SEO and security optimization are the final steps. A simple prompt is given to Claude to improve these aspects, emphasizing their crucial role in website performance. After Claude completes the optimizations, a final commit and push update the live site.
The website's performance is then checked, noting good results despite animations and heavy images, attributed to Next.js's image handling. If performance is suboptimal, the results can be fed back to Cloud Code for further improvement.
Finally, a domain name is purchased (e.g., lagrange-strasbourg.com) via a service like Cloudflare. This domain is then easily linked to the Vercel-deployed site.
For further polish and design refinement, tools like impeccable.style can be used to identify areas for improvement, as AI-generated designs can sometimes be repetitive.